A Simple Kitchen Sink Hack That Prevents Costly Water Damage

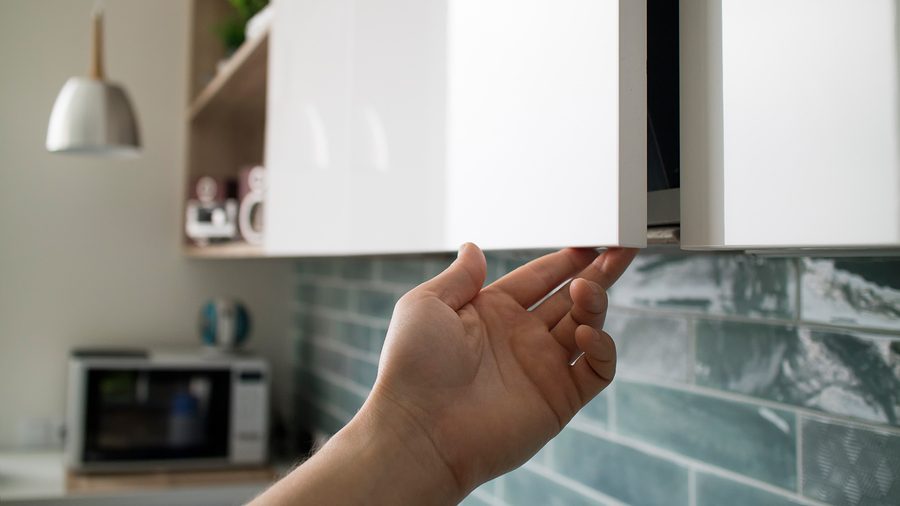
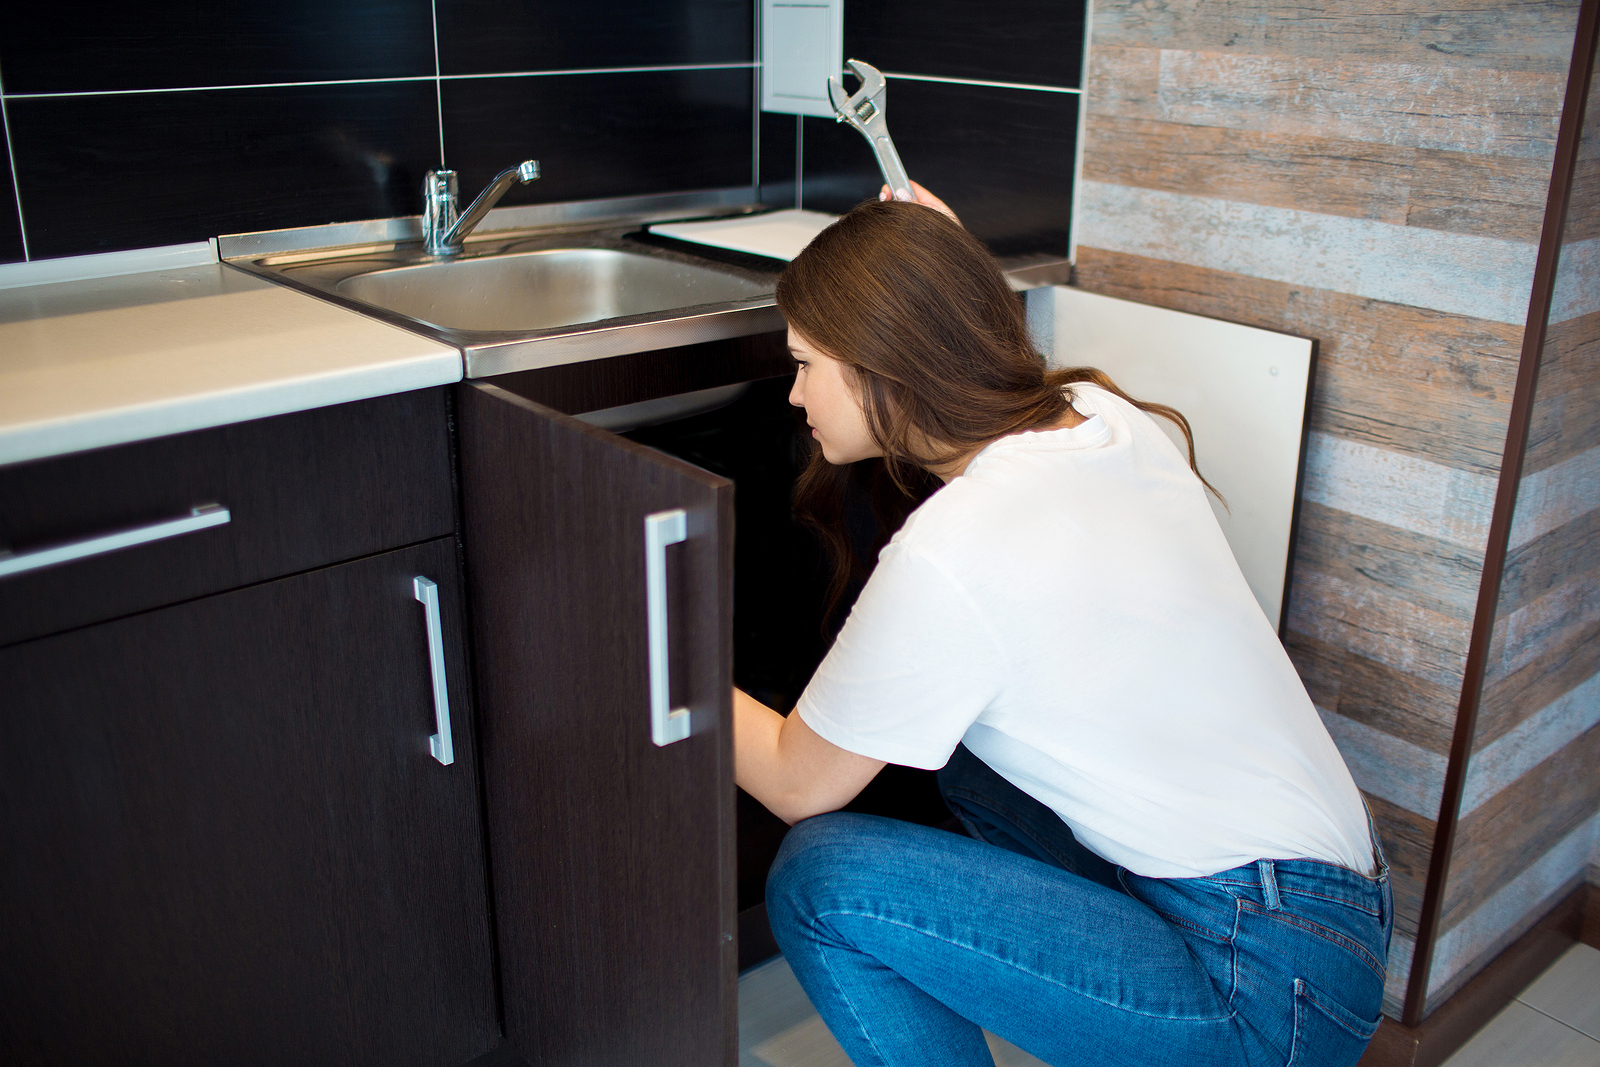
Everybody has a cabinet below the kitchen sink. This is the storage area that houses everything from trash bags and kitchen counter cleaners to sponges, scrub brushes, air fresheners, and other types of household supplies. The kitchen sink cabinet is an important space, but because of its location is also prone to water leaks and subsequent damage. Not only is a wet kitchen sink cabinet floor unpleasant, but it is also a situation that can lead to costly water damages.

Fortunately, there is one very simple and inexpensive hack that can prevent kitchen sink cabinet water damage. Continue below to learn what it is, and marvel at the simplicity and affordability of it all!

Kitchen Remodeling Indianapolis IN 317-454-3612

Peel and Stick Vinyl Tile

Yes, you read the heading correct. Visit your local home improvement store and pick out any variety of peel and stick vinyl tile flooring. This is the ultimate water leak and moisture protector and abatement system for kitchen sink cabinets! But before selecting your choice of peel and stick vinyl tiling, it is recommended to first measure your kitchen sink cabinet surface area. This way, you won’t end up buying a roll or box of peel and stick vinyl tile that is much larger than the amount of product you actually need. Oppositely, you don’t want to buy too little and be face with the second trip to the store for some more.

Vinyl Tiling Installation for Kitchen Sinks

Once you have selected your peel and stick vinyl tile product, your first step to installing it is to thoroughly clear out the contents below your kitchen sink cabinet.

After you have cleared out all of the contents below your kitchen sink cabinet, proceed with comprehensive dusting and surface cleaning. The floor surface of the kitchen sink cabinet must be clean in order for the adhesive of the vinyl tiling to stick.

Now you are ready to remove the paper backing from your vinyl tiling and stick it directly to the floor surface of your kitchen sink cabinet. Work from the back to the front. You may need to do some cutting prior to application, depending on the size and shape of your kitchen sink cabinet surface. Be sure to include a hole for the piping and garbage disposal system if they connect at the surface of the cabinet.

As you are installing your vinyl tiling, be sure to press it firmly to the surface floor of your kitchen cabinet so that it adheres evenly and remain secure. You can expect the vinyl tiling to last for many years with some light dusting and cleaning along the way.

Are you looking for a professional general contractor who can help you with some kitchen renovations or remodeling work? Contact Restoration By L & B, LLC at 317-454-3612 for affordable residential and commercial kitchen remodeling services in Indianapolis, Indiana.

You Might Also Read:

How to Remove Backsplash Tile in the Kitchen
The Best Low Maintenance Options for High End Kitchen Countertops
How to Remove Furr Down Over Kitchen Cabinets

Indianapolis Indiana General Contractors
Indianapolis Indiana General Contractors 317-454-3612

Kitchen Remodel Checklists and Considerations

If you are planning a full-on kitchen remodel, be sure to get all of your thoughts and objectives organized and ready to go. This approach will leave you full-equipped with the right knowledge and game plan for your kitchen remodeling goals. Continue reading to review a basic outline of recommended kitchen remodeling considerations you should have going forward with your project, as well as some checklists that might better organize your objectives.

Indianapolis Kitchen Remodeling
Indianapolis Kitchen Remodeling 317-454-3612

Tips for Kitchen Remodels

When you are preparing for a comprehensive and invasive kitchen remodel, there are a few tips that will put you on the right path towards success. Here are some important tips to use as a guide for developing a plan and course of action for your kitchen renovation:

Confirm Your Priorities and Expectations. What do you want from this remodel? When do you want it to be done? Do you have a budget?

Set a Realistic Budget. How much will it cost for new appliances? Décor? Painting? Labor? Materials?

Choose a Theme or Design. What’s your color palette? Do you have a theme? What design will flow with the rest of the house?

Plan the Logistics. Hiring a general contractor? What’s the agenda? Receiving shipments? How will you live through construction? Do you know your building codes?

Foresee Setbacks and Delays. Do you have a backup plan? Can you make adjustments as you go? Do you have extra materials? Alternatives?

Set a Timeline. What’s your project completion expectation? Can you meet it on time? How will you do it?

Cost Considerations for Kitchen Remodels

There are various cost considerations to remember and address for your kitchen remodel. Use this checklist to make sure you cover them all:

▁ Cabinets
▁ Cabinet Hardware
▁ Sink
▁ Floor
▁ Appliances
▁ Faucet
▁ Cabinet Knobs
▁ Backsplash
▁ Drywall and Cement Board
▁ Light Fixtures
▁ Paint and Primer
▁ Exhaust Fan
▁ Countertops
▁ Inspection/Permit Costs
▁ Fixtures/Furniture/Decór

Additional Materials You May Need:

▁ Tile Adhesive
▁ Drywall Installation Materials
▁ Caulk
▁ Ceiling Texture
▁ Window and Door Trim
▁ Plumbing Fittings

Luxury Items and Materials to Consider:

▁ Soft-Close Hinges
▁ Smart Appliances
▁ More Space
▁ Dimmer Switches
▁ High-End Building Materials
▁ Touch On/Off Faucet
▁ Kitchen Island
▁ Walk-In Pantry
▁ Trash Compactor
▁ Custom Cabinets

Indianapolis Kitchen Remodeling Contractors That Can Help

Call Restoration By L&B LLC at 317-454-3612 for Indianapolis kitchen remodeling services at competitive prices. Owner and general contractor, Lee Elliot, is happy to answer all your questions about home remodel planning, prices, and process. And don’t forget; we guarantee to BEAT any prices quoted by our competition!

Home Remodeling Contractors 317-454-3612

Laminate Cabinet Refinishing Tips

You might assume that laminate cabinets can’t be refinished, but this is far from the truth! There is no need to replace laminate cabinets because they are old or outdated. Instead, you can simply refinish them! Instantly brighten, modernize, and alter the look of your kitchen’s laminate cabinetry all within your budget. It is important to review the correct process for laminate cabinet refinishing in order to achieve the best possible results.

Continue reading to learn some helpful tips to get you started, including who to call when the job is too big to do on your own.

Indianapolis Kitchen Remodeling 317-454-3612

Laminate Kitchen Cabinets

If you are determined to refinish your kitchen laminate cabinets on your own, then good for you! Take a look at the guide below to learn some of the major components and key points for these particular projects. Be sure to prepare by first gathering all the necessary supplies and tools to get the job done right. These include:

⇒ Paint and Paint Primer (Water-Based)
⇒ Foam Rollers
⇒ Rolling Pans
⇒ Painter’s Tape
⇒ Sandpaper (240 & 150 Grit Sheets)
⇒ Old Bed Sheets or Drop Cloths
⇒ Disinfectant Spray
⇒ Clean Rags
⇒ Microfiber Cloth
⇒ Permanent Marker
⇒ Screwdriver

Cabinet Hardware Tips

For an even more updated look, you can purchase and install new, more modern-looking cabinet handles. These are available for a variety of designs and prices at any hardware or home store. If any laminate is peeling or cracking, it will need to be replaced entirely. Do not proceed to refinish peeling o or cracked laminate cabinetry.

However, if it is only slightly peeling in one corner or so, you can simply sand the exposed area behind the laminate, and then re-glue it using a water-proof adhesive. Use masking tape to hold it in place while it dries. This works best for small areas and corners. Once you have accumulated all the tools and supplies you need, you are ready to get started. Here’s how:

A General Overview of the Process

First clean all of the cabinets. Dust them with the microfiber cloth to remove solids, and then follow with a thorough wipe down using the disinfectant spray. This provides stronger primer adhesion and ensures a cleaner smoother finish.

Step 2, using the screwdriver, remove each cabinet face and its handle while keeping track of where each one goes. Use the permanent marker to label each one so you will remember where to replace it later.

Step 3, place the cabinet faces on the drop cloths, making sure the edges remain exposed and accessible. Be sure the drop cloths cover enough surface area to protect the surrounding environment from paint.

Step 4, use the painter’s tape to line the inside edges of the cabinet faces to prevent paint drips. Take your time on this step to ensure accuracy.

Step 5, use the 240 grit sandpaper sheets to manually sand the cabinet faces. You may choose to use a handheld portable sander if you are familiar with its operation. Just be sure to not over-sand.

Step 6, after sanding, use your microfiber cloth to wipe away the residual dust and sanding debris. Do this thoroughly and remove as much dust as possible.

Step 7, using your foam roller, apply a coat of water-based paint primer to each cabinet face. Allow this to dry completely, usually 8 to 12 hours depending on the brand.

Step 8, once the primer is applied and has dried completely, sand each cabinet face again using the 150 grit sandpaper. Remove excess sanding dust with your microfiber cloth afterwards.

Do steps 7 and 8 again.

Step 9, once both coats of primer are applied and have dried, it is time to apply your water-based paint of choice using your second foam roller. Be sure to use v-strokes during application to promote even paint marks and distribution.

Repeat step 9.

Last step, allow the cabinets to dry for at least 72 hours before reattaching hardware and reassembling them in their rightful place. This ensures that the paint has dried and hardened completely.

When the Job is Too Big…

Call Restoration By L&B LLC at 317-454-3612 for Indianapolis home remodeling and handyman services at competitive prices. Owner and general contractor, Lee Elliot, is happy to answer all your questions about home remodel planning, prices, and process. And don’t forget; we guarantee to BEAT any prices quoted by our competition!

Residential and Commercial Remodeling

How to Remove Furr Down Over Kitchen Cabinets

Indianapolis Kitchen Remodeling 317-454-3612

Indianapolis Kitchen Remodeling 317-454-3612

If you are currently knee-deep into a kitchen remodel, or even in the planning stages, then you have probably heard a thing or two about kitchen cabinet furr downs. “Furr down” is simply the enclosed area that sits between the ceiling and the kitchen cabinets. It looks like it is part of the cabinet system or wall, but it is in fact a hollow, enclosed area that serves no purpose in modern interior design. This is why so many homeowners choose to remove furr downs; it gives kitchens a more open and brighter feel. If you are interesting in learning more, continue reading for a brief introduction to removing furr downs over kitchen cabinets.

The Run Down on Furr Downs

It is not always a good idea to remove furr downs. That is because you are never entirely sure what lies behind them. Sometimes you get a blank wall space, and other times you get exposed plumbing, duct work, and electrical wires. To avoid surprises, it is best to contact a licensed general contractor for professional advice and assistance. Otherwise, the only other way of finding out is to open it up.

Furr Down Removal Tips

⚒ Use a utility knife to cut the caulk lines along the areas of trim that bond the joints with the cabinets and ceiling. Softly pry off the trim to expose the seams. Furr downs made of plywood are much easier to pry off. Furr downs that are covered in drywall are more difficult to remove (and messier).

⚒ If there is no exposed plumbing or wiring, you can go ahead and remove the framing that supports the furr down.

⚒ Procure and install matching crown molding in the newly exposed space if the rest of your kitchen has crown molding. Use butt joints for precise cohesion between new and old crown molding.

⚒ Many homeowners with kitchen crown molding also choose to install trim along the top edge of the cabinets.

⚒ If there is no wiring or plumbing, but a vent exposed under the furr down, hire a general contractor to install an enclosed and painted plywood box around it. Then install crown molding above to blend it with the rest of the wall.

⚒ If you have a textured ceiling but there are left over flat spots from the installation process, use a small paint brush and ceiling paint to stifle the flat areas and blend them into the rest of the ceiling.

Indianapolis Home Remodeling Contractors

Indianapolis Remodeling and Painting

Indianapolis Remodeling Contractors 317-454-3612

Call Restoration By L & B, LLC at 317-454-3612 for professional kitchen remodeling in Indianapolis, Indiana and its surrounding areas. Owner and licensed general contractor, Lee Elliot, is happy to provide on-site written estimates, and will answer all of your home remodeling questions with care. We manage a wide range of remodels, renovations, and repairs for all residential and commercial properties. Call 317-454-3612 to get in touch with our trusted Indianapolis home remodeling contractors, today.

Quick DIY Kitchen Makeover Tips

Indianapolis Kitchen Remodeling 317-454-3612

Indianapolis Kitchen Remodeling 317-454-3612

Kitchen remodeling is a quality investment that adds value to your home. But sometimes, no matter how desperately you want it, it isn’t always the right time to invest in kitchen upgrades and renovations. For times like these, it is great to find a budget-friendly alternative to a full kitchen remodel. There are a few simple things you can do as a homeowner to improve the function, quality, and comfort of your kitchen; and all within a reasonable budget!

Continue reading and discover a handful of easy and affordable Do-It-Yourself kitchen makeover tips for your home.

Replace Your Range Hood

The indoor air quality in your home is vital to your health and comfort. With homes being built so tightly these days, it is important to make sure your kitchen is properly ventilated at all times. This is especially true for kitchens since cooking releases heat, moisture, smoke, grease, and airborne residues that are detrimental to the indoor air quality and structural integrity of a home. For this reason, range hoods are an important kitchen appliance for every home, especially smaller ones. If you want a budget-friendly kitchen upgrade that will also save you money in the long run, consider replacing your old kitchen range hood with a newer, energy-saving range hood. Including installation and labor costs, you can budget the new upgrade within $500 or less.

Stain Your Cabinets

If you want a simple upgrade that you can afford and do yourself, consider re-staining your kitchen cabinetry. Start by removing your cabinets using the proper tools. Then remove all the cabinet hardware. At this point, you need to take the time to thoroughly clean the cabinets before applying your choice of stain. Once they are clean and free of grime, you can proceed with the staining process. You can even take it a step further by lightly sanding the cabinets after they are stained, and then applying a clear coat finish. This will drastically improve the look of your kitchen cabinetry! And if you are not a fan of staining, try priming and painting kitchen cabinets a bright white color for a fresh new look.

If you have old, outdated laminate counter tops…

You can consider applying a faux countertop resurfacing paint for a luxurious and modern look! Try Rust-Oleum® Countertop Transformations™ Countertop Resurfacing Kit – $250, available at Lowes® and other hardware stores.

Change the Light Bulbs

Changing out all your old light bulbs with LED or CFL light bulbs can save you money on your monthly energy costs. Although it may not be noticeable in an aesthetic sense, it will certainly be noticeable on your energy bill! Swap out hanging bulbs, cabinet lights, under-counter lights, and all other light fixtures in your kitchen to save energy and money.

Weather Strip Doors and Windows

You can also reduce your energy consumption and save on utility costs by weather-stripping the exterior doors and windows attached to your kitchen. Not only will this make your home much more comfortable in the cold of winter and the heat of summer, it is an Eco-conscience method of saving money! If you are not interested in weather stripping, you can consider buying a roll-on window insulating film kit that you can apply on single-pane windows yourself.

How to Get More Juicy Tips!

Check out our blog about How to Remodel a Home Without Remodeling at All to learn even more budget-friendly ways to update the look of your home!

Indianapolis Kitchen Remodeling

General Contractors Indianapolis IN

Indianapolis Painting Contractors 317-454-3612

Call Restoration By L & B, LLC at 317-454-3612 when you need Indianapolis kitchen remodeling services you can afford. Owner and general contractor, Lee Elliot, provides home remodeling and restoration services at the most competitive prices in town. In fact, we will beat any competitor’s price, guaranteed! We also offer written estimates, commercial services, in-home consultations, and more. You name it, we can do it! Call 317-454-3612 for professional-grade kitchen remodeling in Indianapolis and its surrounding area.