How to Repair Nail Pops in Walls

Drywall Repair and Painting 317-454-3612

Drywall Repair and Painting 317-454-3612

Underneath all the walls in your home is a structural material called drywall. The drywall is installed using a variety of traditional construction tools, namely, screws and nails. Overtime, no matter how well your home’s drywall was constructed, it is normal for walls to experience a common problem known as nail pops. This occurs when the nails and screws in your drywall loosen, and subsequently push the heads of them toward the inside of the wall.

The result is a blister or bump-like protrusion on your flat, smooth wall. So of course, when homeowners see this kind of wall damage, they instantly look for fast and affordable solutions.

Nail Pop Repair

Fortunately, nail pops are not serious issues. They are relatively easy to repair, so long as you retain adequate knowledge surrounding drywall repair and finishing techniques. If you do not, it is recommended to hire a professional contractor or handyman that is experienced in drywall repair and painting service. They have the proper tools, training, and materials to provide professional results in a convenient time-frame. If you choose to do it yourself, here is what you’ll need to do:

Needed Supplies:

Drywall Knife
Drywall Screws
Hammer
Power Drill
Hand Trowel
Drywall Mud
Sandpaper
Primer
Paint
Paintbrush

Locate the Framing

Use your fingers to tap the drywall and find where the framing is located. Hollow sounds indicate no framing, while dense sounds indicate framing. Once you think you found the framing, double-check by tapping each side to make sure they are hollow. If you have a concentrated area of nail pops on one wall, there is most likely a frame right behind it.

Screw in the Drywall

On the framing, insert one drywall screw a few inches above and below the nail pop, and secure the drywall back into place.

Press the Nail Pop

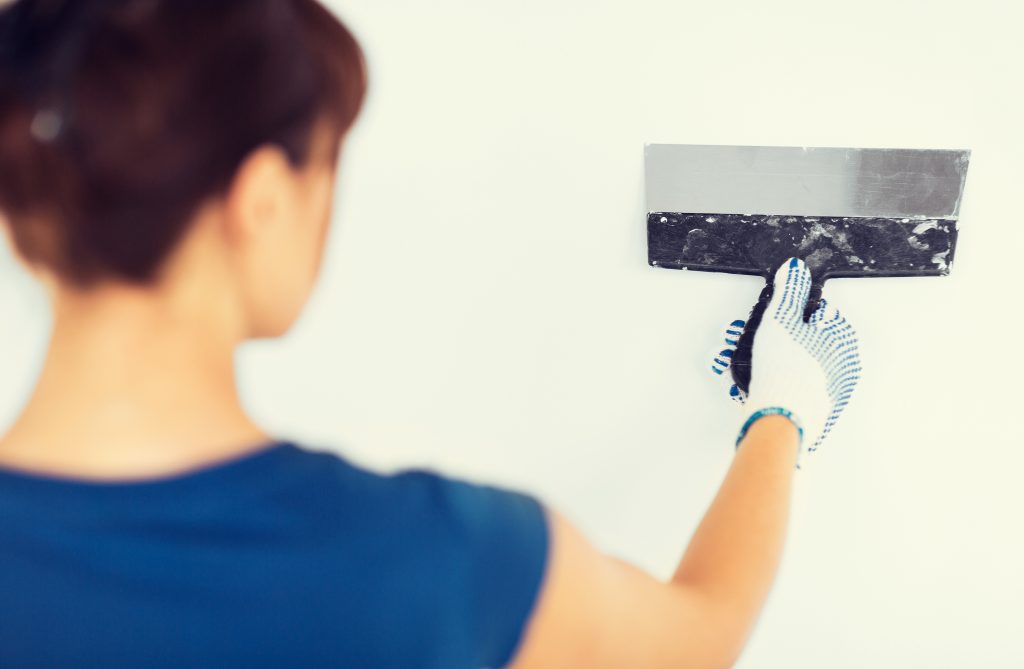
Depress the nail pop back into the wall by gently using a hammer. Use a drywall knife to collect the associated broken material.

Apply Drywall Mud

Twice-coat the affected area and the head of the screws with quality drywall mud. Using two coats with provide more secure coverage and smoother results.

Sand the Wall

Once the drywall mud is dried, lightly sand the area down until it is a smooth and even surface. Be sure to use the proper-grade sandpaper for optimal results.

Prime and Paint

When the area is sanded to a smooth finish, it is ready for primer and paint. Use a high-quality primer, and allow it to dry completely before applying paint. Use the same paint color as the rest of the wall, unless you wish to change the color of the entire wall.

Restoration By L & B, LLC

General Contractors Indianapolis IN

Indianapolis General Contractors 317-454-3612

Call Restoration By L & B, LLC at 317-454-3612 for professional drywall and painting services in Indianapolis, IN and its surrounding locations. Owner, Lee Elliot, is a licensed general contractor that provides quality and affordable handyman services for residential and commercial properties, including drywall repair and installation, interior and exterior painting, remodels, renovations, and much more. We guarantee to beat any competitor’s price! Call 317-454-3612 to schedule a detailed assessment, today.

Tips for Ceiling Crack Repair

Drywall Repair and Painting 317-454-3612

Drywall Repair and Painting 317-454-3612

Everyone would probably agree that a home is an important and valuable asset. For this reason, it is important to protect properties from wear and tear. One common household repair that arises overtime are ceiling cracks. Ceiling cracks are important to repair if you wish to add a fresh coat of paint or improve the surface appeal of ceilings.

No matter what project you have on deck, a few ceiling cracks are nothing to fret about. A small portion can be easily repaired on your own, however, larger areas of ceiling cracks will probably require professional repair service. A good way to gauge this is by count. If there are more cracks than you can count, then you are most likely better off hiring a professional contractor.

Repairing Ceiling Cracks

Ceilings can be made of plaster or drywall. They each require a separate approach for repairing cracks, so it is crucial to know which material your ceilings are made of before getting started. Here is a step by step instruction guide for repairing ceiling cracks in both plaster (P) and drywall (D) ceilings:

Step 1

Plaster: Scrape loose paint and plaster fragments out of cracks with a screwdriver or 5in1 tool. Then widen cracks to ¼ an inch to hold a sufficient amount of patching compound.

Drywall: Use a 1 inch putty knife to scrape any loose paint or material around the cracks. Do not widen cracks.

Step 2

P: Use 100-grit sandpaper to smooth out the edges of the cracks.

D: Do the same for drywall ceilings.

Step 3

P: Remove all sanding dust and debris with cloth or vacuum.

D: Cut up pieces of fabric tape to a length that is a ½ an inch longer than the cracks. For winding cracks, use several small pieces to create one uniform piece.

Step 4

P: Using a plaster-repair or spackling compound, spread a layer of patching compound into the ceilings cracks with a 1” putty knife. Allow to dry for a minimum of 5 hours.

D: Using drywall mud or patching compound, spread a thin layer into cracks with a 3” putty knife. Spread out the material to a once inch circumference around the crack.

Step 5

P: Using 200-grit sandpaper, sand the dried material and cracks smooth.

D: Gently press the pieces of fabric tape onto to the wet compound with fingers and then smooth them out with 3” putty knife. Allow to dry for a minimum of 5 hours.

Step 6

P: Apply a second, thinner, and broader layer of compound over the cracks and adjoining paint. This reduces compound shrinkage problems and gives a smoother more uniform look. Allow to dry for a minimum of 5 hours.

D: Using 200-grit sandpaper, lightly sand edges of dried cracks.

Step 7

P: Using 200-grit sandpaper, sand the dried material and cracks smooth. Remove all sanding dust and debris with cloth or vacuum.

D: Apply a second, thinner, and broader layer of compound over the cracks and adjoining paint. Allow to dry for a minimum of 5 hours. Remove all sanding dust and debris with cloth or vacuum.

Restoration By L & B, LLC

Call Restoration By L & B, LLC at 317-454-3612 for professional ceiling repair in Indianapolis, Indiana. Owner, Lee Elliot, is a licensed general contractor that can provide a wide range of home and commercial remodeling services. We offer residential and commercial remodeling, restoration, renovation, and repair services at the most competitive prices in town. Call 317-454-3612 for drywall repair, painting services, and ceiling crack repair in Indianapolis, IN and its surrounding counties.

How to Patch a Plaster Wall

Remodeling a home can bring to light many unexpected surprises, like an old plaster-over-lath wall for instance. Many homeowners immediately feel the urge to rip down plaster and replace it with drywall. But sometimes, a plaster wall can be salvaged if done correctly. Continue reading to learn how to patch a plaster wall and more!

Drywall Repair and Painting 317-454-3612

Drywall Repair and Painting 317-454-3612

Patching Plaster

Plaster is applied to latticework, or laths, which are basically narrow boards or strips of wood that create a framework for a wall. Overtime, plaster can pop off its laths. Sometimes, if the plaster is firm and falls off in large pieces, they can simple be reattached and re-sealed. Other times, crumbled or soft plaster will need to be completely removed down to the latticework and to the outer edges of firm plaster, and then re-done from start to finish. Either way, patching up a plaster wall is possible and can be done all on your own with the right tools and knowledge.

How to Get Started

First, gather all your necessary supplies. You will most likely need a chisel, a trowel, lime putty (combination of hydrated dolomitic lime and water), clean dry cloths, fiberglass mesh tape, angle plane or drywall screen, a bonding agent, a mixing board, and a colorless sponge.

With all supplies ready to go, use the chisel to remove the old plaster from between the latticework. Be sure to wipe away all the loose plaster crumbs, dust, and debris.

Now, use your angle plane or drywall screen to smooth out the hole around the plaster. Next, apply the bonding agent over the latticework, as well as, all the plaster that is to be patched or re-coated.

Cover all of this, except for the small cracks, with your fiberglass mesh tape.

Next, prepare your lime putty by combining your hydrated dolomitic lime with water until you get a consistency similar to yogurt. Allow the lime to disintegrate in the water for at least 20 minutes, until a thin layer of water rests on the top. This ensures even re-hydration.

Apply a heap of the putty to your mixing board in a ring shape. Pour some bonding agent in the center and continue to mix in handfuls of gauging plaster until you achieve the proper consistency.

Use your trowel to mix all of this until you get a dough-like result. Apply this mixture to the exposed laths and around the edges of the holes, using firm pressing motions. Leave a slight decompression for the final coat later on.

Cut out another sheet of fiberglass mesh at a size that matches the hole and firmly press it into the wet plaster.

Mix another batch of the lime putty mixture, this time using less gauging plaster to get a softer product that’s easier to work with.

Apply a thin and final coat over the mesh and previously-lain plaster. Use your sponge to touch up any inconsistencies or imperfections on the wall.

Wait at least 30 minutes for everything to dry. Sanding should be necessary!

Professional Drywall and Plaster Patching Services

Patching up a plaster wall is not a novice job. It takes practice and a bit of handyman knowledge to do a good job. For this reason, most homeowners would better benefit from hiring a licensed general contractor for accurate and professional drywall or plaster wall repair services. And you’d be surprised just how inexpensive these services cost.

Restoration By L & B, LLC

Home Repair Service 317-454-3612

Home Repair Service
317-454-3612

Call Restoration By L & B, LLC at 317-454-3612 for professional wall repair services in Indianapolis, Indiana. Owner and licensed general contractor, Lee Elliot, is happy to answer your questions about plaster patching services, drywall repair, and more. We offer residential and commercial home remodeling and repair services at the most competitive prices in town. Call 317-454-3612 for a free estimate or information regarding drywall repair in Indianapolis, IN today.