Are You Having Problems With Your Bathroom Exhaust Fan?

Could you imagine what your bathroom experience would be like without your exhaust fan? If you have a window, it wouldn’t necessarily be an issue; but for those who lack a bathroom window and have a faulty exhaust fan, the situation is far from pleasant. What’s worse is, a broken exhaust fan in an otherwise ventless bathroom could pose serious health and safety risks. If your bathroom exhaust fan is acting up, whether you have a window or not, it is in your best interest to resolve the malfunction before things like mold, mildew, and wet walls cost you.

Continue reading to learn what you need to know about bathroom exhaust fan breakdowns, and where to turn for trusted drywall and bathroom remodeling services if yours has already caused such structural damages.

Indianapolis Drywall and Painting 317-454-3612

The Risk Behind a Broken Bathroom Exhaust Fan

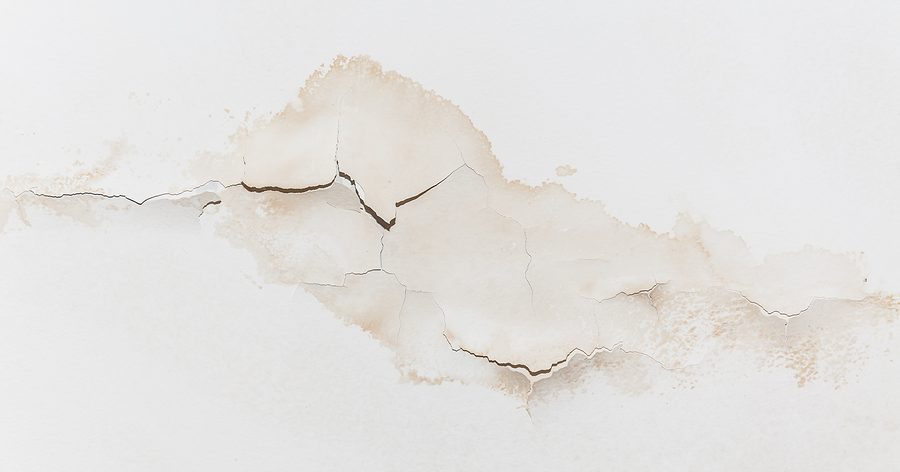
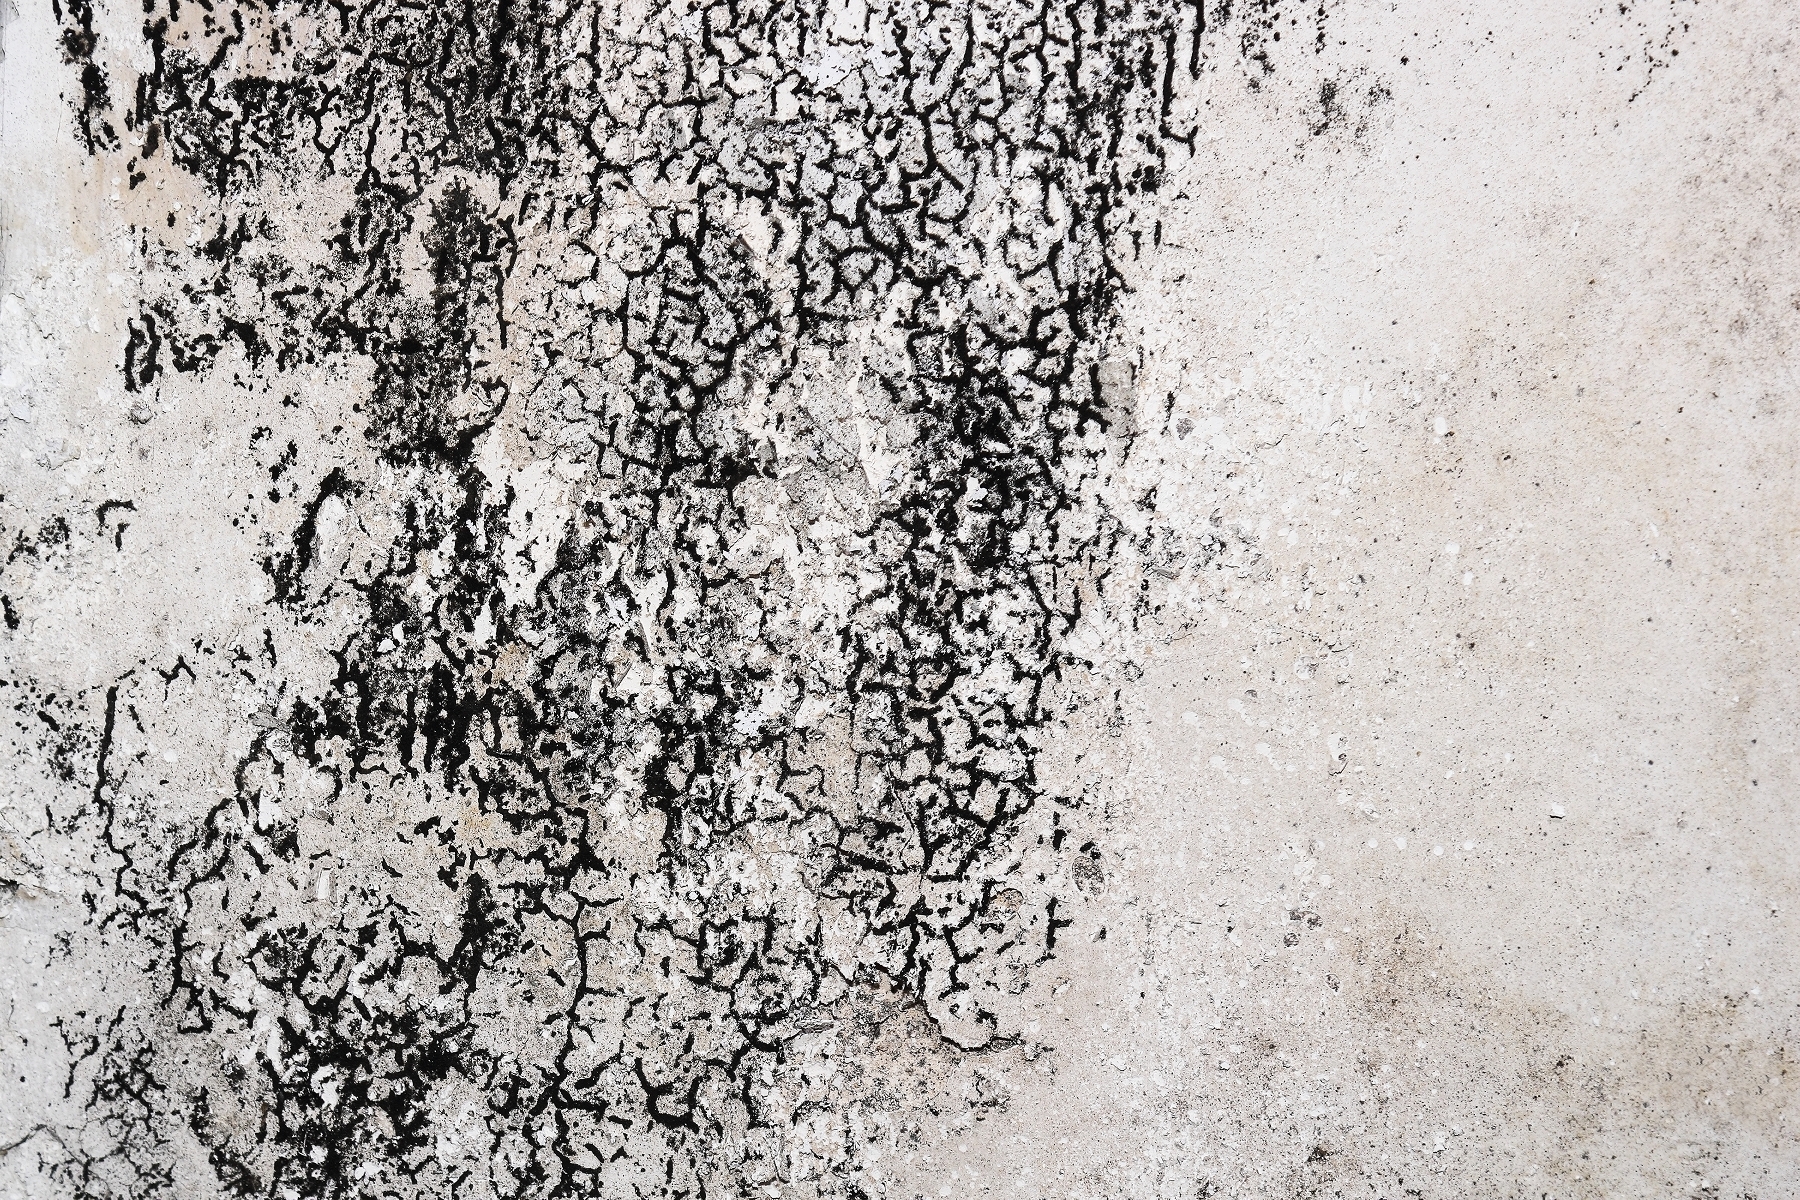
When a bathroom exhaust fan stops working, or begins to fail, the primary risk is moisture. Moisture is created every time someone takes a steamy shower or runs the hot water faucet. Without a properly functioning fan, this excessive condensation seeps into the walls and turns into water, quickly causing mildew development, and overtime, fungal and mold growth.

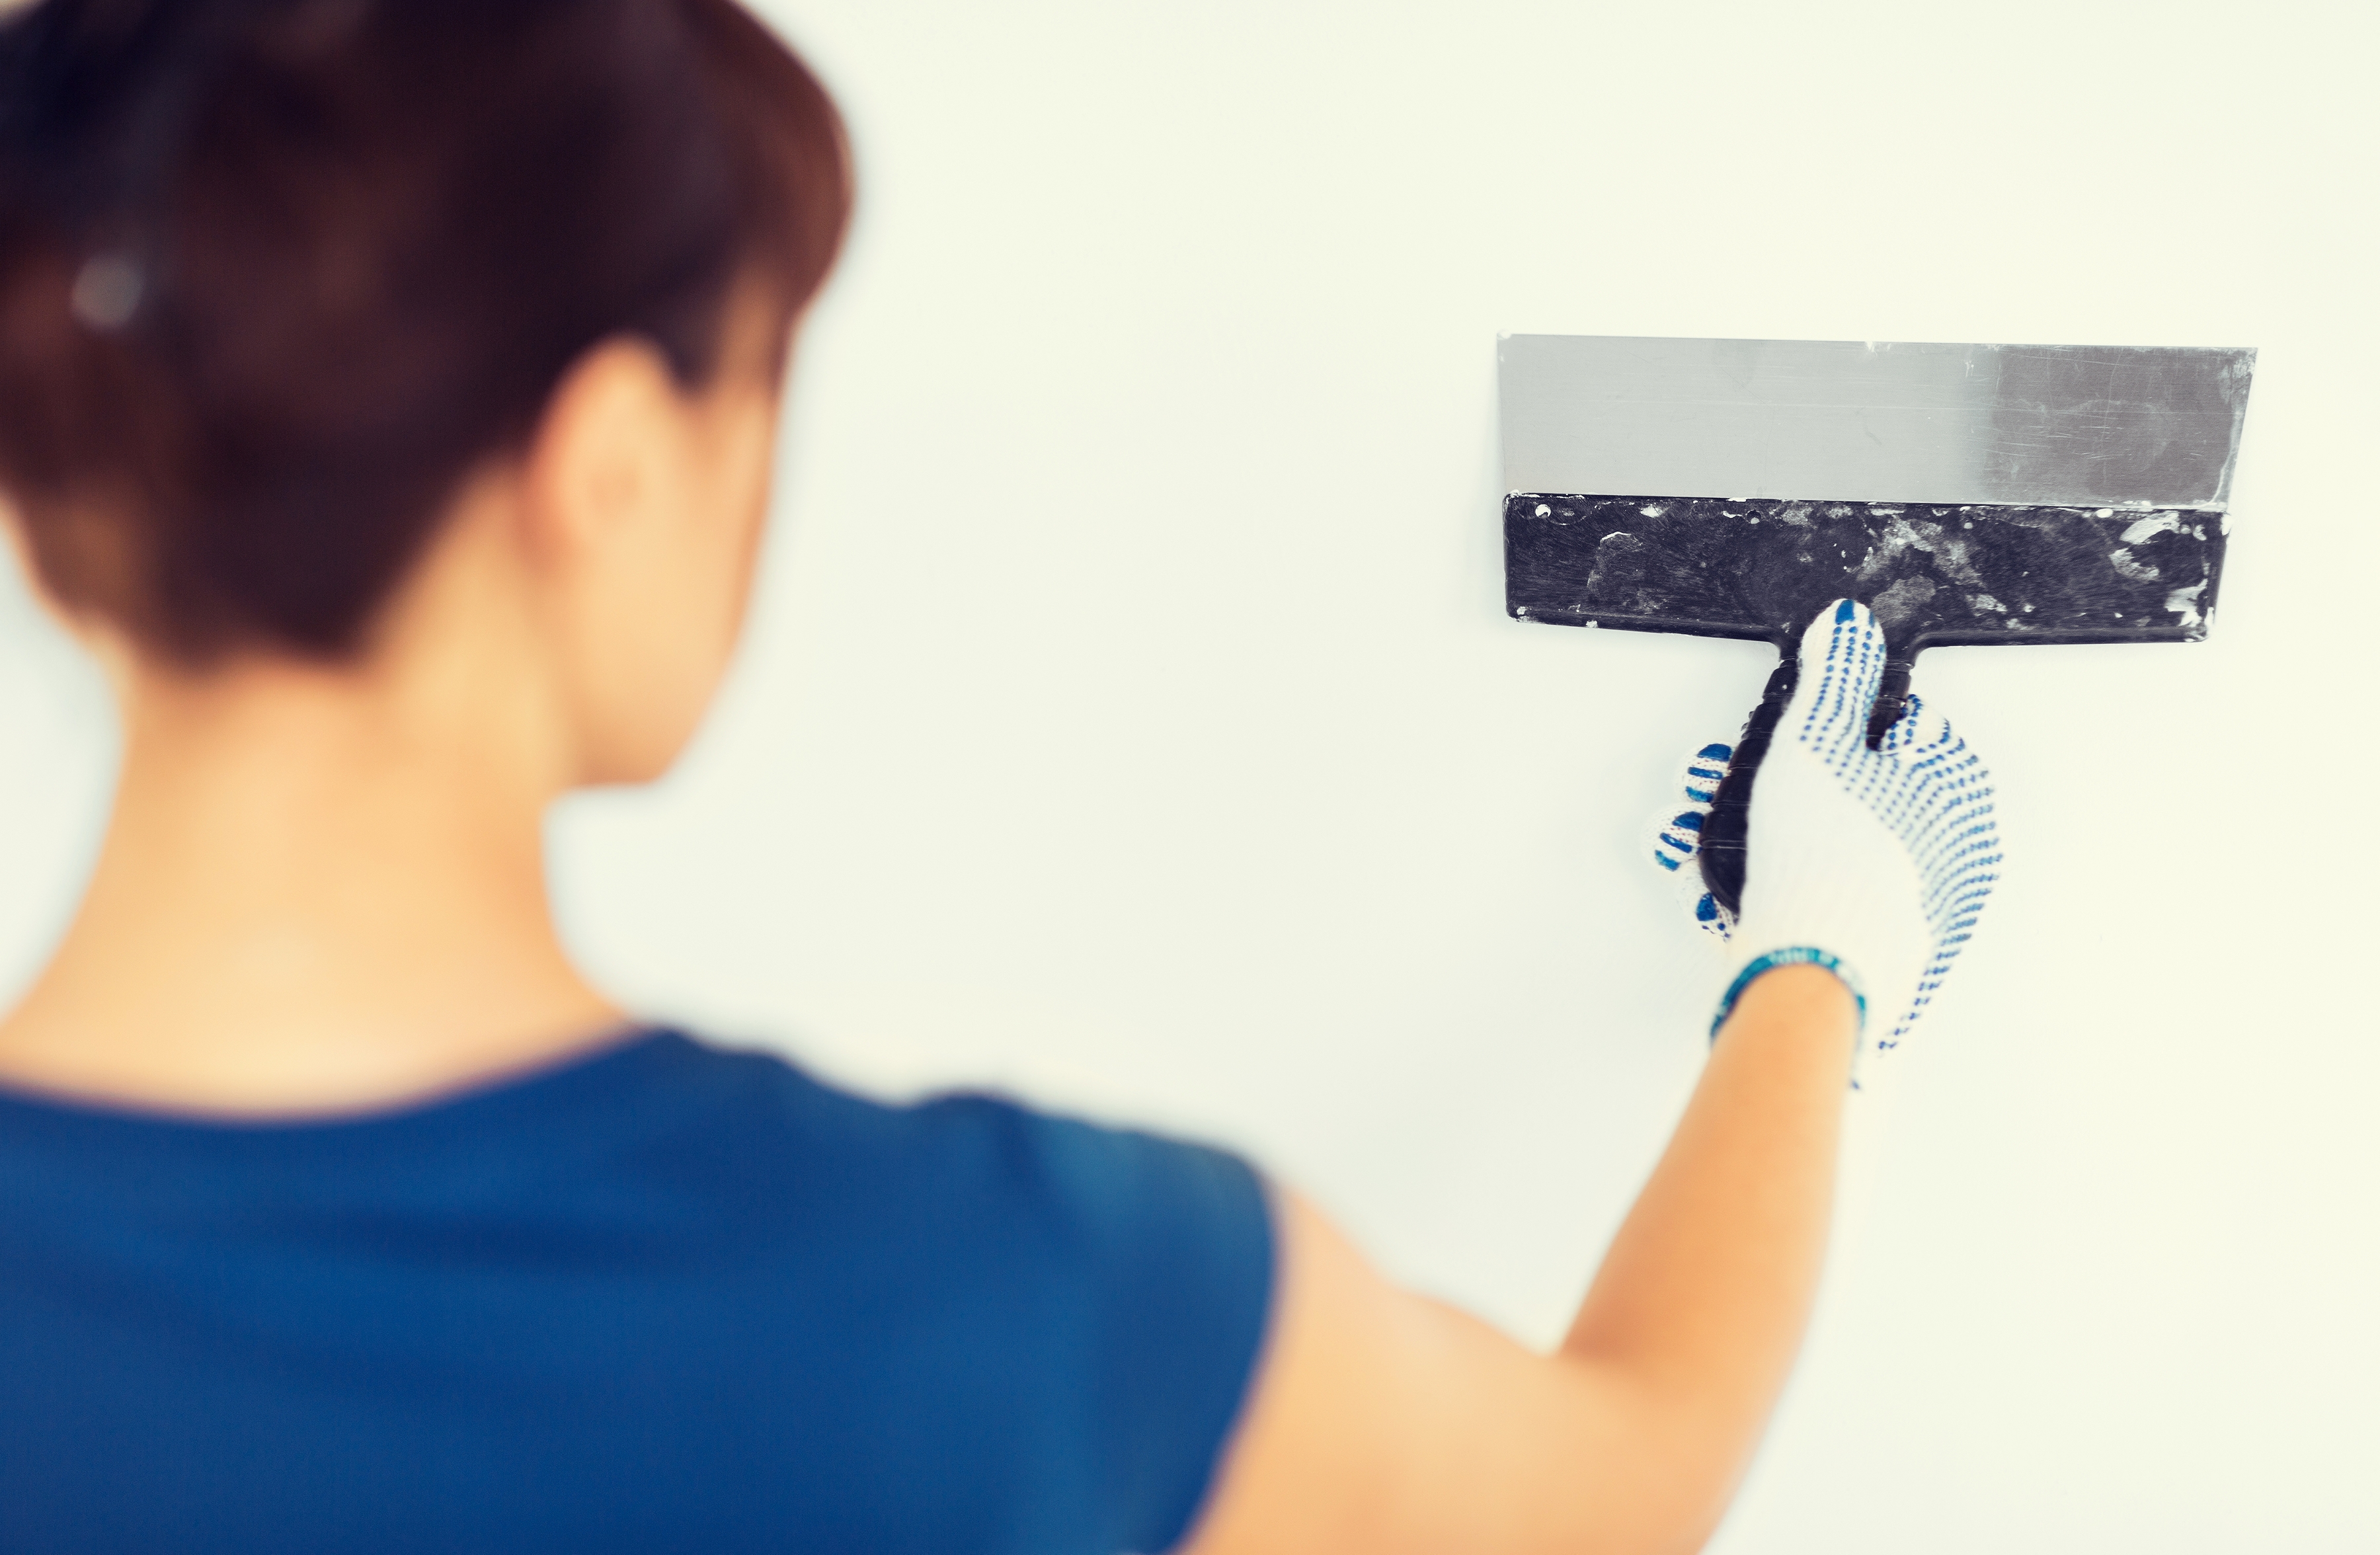
What’s worse is, often times mold development goes unnoticed for long periods of time because it is trapped inside the walls. It is important to always keep your eyes out for signs of mold development, including peeling paint, wet walls, and warped drywall. Even floorboards can become over-saturated with moisture and develop mold, which often presents itself in the form of warped or wet flooring. It is vital to have all moldy walls removed and replaced with clean, fresh drywall, and that all mold outbreaks have been remediated by a certified service provider.

Repair a Broken Exhaust Fan ASAP

If your bathroom exhaust fan is broken, keep your window cracked for a little while during and after every hot shower or bath to ensure that most moisture is expelled outside. If you do not have a window in your bathroom, you must have your broken exhaust fan repaired or replaced promptly, otherwise, you take on the risk of developing a mold outbreak in your home, which will cost you more in the long run compared to fan repair expenses. Placing a floor fan in your bathroom also helps abate moisture retention, but should only be relied on temporarily while waiting to repair your exhaust fan.

Are you considering a bathroom remodel? Do you need professional drywall work? Contact Restoration By L & B, LLC at 317-454-3612 for bathroom remodeling services or drywall repair in Indianapolis, Indiana.

You Might Also Read:

How to Properly Maintain a Bathroom Exhaust Fan
Bathroom Ceiling Heaters are Perfect for Winter
Master Bathroom Remodeling Hacks That are Actually Affordable

Indianapolis Indiana General Contractors
Indianapolis Indiana General Contractors 317-454-3612

How to Decide Between a Nail and a Screw

When it comes to home renovations and handyman projects involving wood, nails and screws are staple supplies to have on hand. But how do you know which one to use and when? Although the debate is ongoing, there are some facts and considerations that can help you decide which fastener is best for your particular home improvement application.

Continue reading to learn a few pointers for choosing between a nail and a screw, as well as, what to do if you are stuck making progress on your home repair or project.

Indianapolis Handyman 317-454-3612

Nails or Screws?

The truth is, both nails and screws are excellent fasteners for wood so they can usually be incorporated interchangeably. So long as you size your unit correctly and install it properly, you should have success with either one. Ultimately, the unit you choose to use on your particular application depends on personal preference and availability of tools and supplies.

First, consider how strong and lasting you need the connection to be. Screws are stronger by nature of installation, and therefore, are good choices for heavy or large items, such as drywall. Nails are slimmer, but come in very long size variations, making them good choices for aesthetic applications, thinner materials, and lightweight items like picture frames.

Next, think about the tools you have on hand. You want to match the type of screw or nail with the proper tool. If you only have a hammer, you may want to stick with nails, but if you have a power drill or screw driver, you can choose screws. Likewise, if you only have a Philips Head screw driver, you would need to use Philips screws. Phillips screws deliver a tighter fit compared to flat head screws, making them more popular among factories and handymen.

Third, take into consideration the size and shape of your wooden building materials. Screws tend to have more tensile strength, while nails have shear strength. Nails, although can bend under pressure, are quite strong and rarely snap. Screws are more brittle, but they connect wooden boards together, tighter and stronger. Screws also work better with wood’s natural structural propensity to expand and contract.

Common Nail Applications:

▻ Roof and Wall Framing
▻ Plywood Sheathing
▻ Hardwood Floors
▻ Siding/Roofing
▻ Interior Moldings
▻ Solid-Wood Edgings for Plywood Shelves
▻ Stiles and Rails for Cabinets
And anywhere else you don’t want to damage wood with a screw.

Common Screw Applications:

▻ Drywall Hanging
▻ Wood Deck Fastening
▻ Cabinet Installation
▻ Wooden Toys
▻ Bookcases
And any other wooden connection that you wish to take apart.

Stuck on a Home Renovation Project?

Call Restoration By L & B, LLC at 317-454-3612 for affordable residential remodeling services in Central Indiana and its surrounding areas. Our Indianapolis general contractors provide a wide range of services for both commercial and residential properties, from general handyman services and home remodels, to full-on renovations, additions, conversions, and more. Request an estimate, today!

3 Types of Ceiling Cracks and What They Mean

When you spot a crack in the ceiling, you might feel a sense of panic. What could this crack mean? Is there a serious underlying matter that has to be resolved? Is my home going to require a tedious renovation? But before you spiral into all sorts of possibilities, keep in mind that not all ceiling cracks are serious. In fact, some are simply cosmetic. For this reason, a little knowledge goes a long way, especially when it comes to peace of mind.

When you spot a crack in the ceiling, you might feel a sense of panic. What could this crack mean? Is there a serious underlying matter that has to be resolved? Is my home going to require a tedious renovation? But before you spiral into all sorts of possibilities, keep in mind that not all ceiling cracks are serious. In fact, some are simply cosmetic. For this reason, a little knowledge goes a long way, especially when it comes to peace of mind.

Continue reading to learn 3 common types of ceiling cracks and what they might imply for your home.

Indianapolis Drywall and Painting Service
Indianapolis Drywall and Painting 317-454-3612

❶ Thin Straight Cracks

If you discover a fine, straight crack in your ceiling, it is often an indication of poor joint taping. Basically, whoever did the framing work for the home did not use a sufficient amount of drywall mud during the taping step of the project. As a result, the tape did not adhere well enough to the joint. This creates a crack along the edge of the slackened tape.

The good news is that this is entirely superficial, so there is no need for immediate repair. If you do mind the cosmetic defect, you can apply a thin lawyer of drywall compound under the loose tape and re-securing it to the drywall.

❷ Tiny Spider Web Cracks

When you have tiny, web-like cracking in your ceiling, it is likely another superficial defect. Such cracks generally occur as a result of insufficient drywall compound when creating a textured ceiling. In contrast, if the cracks are more like a starburst, or go outward in multiple directions, it is likely a result of using too much drywall compound to create a textured ceiling. This is because compound shrinks as it is drying. To fix this problem, you can simply cover the blemish with more drywall compound, but this may require some sanding and priming first.

❸ Discolored Cracks

When you spot yellowish brown stained cracks in the ceiling, it is not a good sign. Not only could discolored cracking be a sign of a water leak, it could also pose serious structural hazards. In this case, you would need emergency inspection services to confirm the cause of the leak. Once you have determined what has caused the leak, you will need to have that problem repaired before you can refinish the drywall and ceiling.

⚠ Regardless of the types of cracks you have in your ceiling, it is important to have them inspected as soon as possible in case the problem is a water leak or structural issue. Try to have your inspection scheduled within 3 to 5 days to be safe.

Indianapolis Drywall Contractors Who Can Help

Call Restoration By L & B, LLC at 317-454-3612 for affordable drywall and painting service in Central Indiana and its surrounding areas. Our Indianapolis general contractors provide a wide range of drywall and painting services for both commercial and residential properties, from inspections and diagnostics, to full-on home renovations, additions, conversions, and more. Request an estimate, today!

Residential and Commercial Remodeling

How to Get Rid of Black Mold on Walls and More

Indianapolis Drywall and Painting Contractors 317-454-3612

Indianapolis Drywall and Painting Contractors 317-454-3612

Black mold is dangerous. Not to mention unsightly, disgusting, smelly, and destructive. Needless to say, black mold is a problem and should be treated and eliminated immediately upon discovery. If you have recently discovered a festering wall or other area of your home that has been consumed by black mold, it is time to take necessary action and get rid of it for good.

Although minor black mold remediation can be done on your own, large-scale projects require professional operations. Make that assessment with the help of a trained mold remediation contractor. They can determine whether or not the mold infestation is on a small scale or a large one. Sometimes the degree of mold damage is not always exposed, making it imperceptible at first or second glance.

Once you have a good idea of how extensive the black mold is in your property, you can determine whether or not you require professional services. If you can tackle the project on your own, continue reading and learn an effective method of black mold removal and remediation.

Black Mold Removal

When working with mold, it is vital to wear a respirator, or a face mask designed for mold spores, to protect yourself from potential health complications related to mold spore inhalation. All exposed skin should be covered as well. As mentioned, the first step to getting rid of black mold is to hire a professional to determine the extent of damage. If it is decided that the infestation is manageable on your own, you are ready to continue to the process.

The next place to begin is identifying the cause behind the mold growth. This might also require the help of a trained professional, perhaps a plumber or general contractor. This is because the source of mold growth could be from a water leak or appliance condensation in wall, pipes, roofs, or foundations of a property. These leaks or condensation issues need to be resolved before a mold problem can be eliminated.

When the first two steps are done, it is time to close off the affected area. Vents need to be covered, doors and windows should be tightly shut, and entries or openings need blocked off with plastic tarp and duct tape. The area must be entirely sealed to the best of your ability. Place floor fans, facing outward, in entry ways helps to push airborne spores outside.

Before starting any actual mold removal, spray the affected area and mold with water. This helps reduce the amount of airborne spores when moving them around. Using a brush or sponge, scrub the mold away with soap and warm water. Regular dish detergent is fine. Remember that not all mold spores are colored or visible, so scrub the entire area, as well as, any surrounding areas to make sure all mold is removed.

Once the area is scrubbed with warm soapy water, repeat this process, only this time, using bleach. Apply bleach to the entire area and then rinse with fresh water and a clean rag. If you do not have bleach or dislike using bleach, vinegar will do the trick as well. Or you can purchase a mold cleaning solution at the store. Discard all equipment and supplies used to clean the black mold in a large garbage bag and take it outside through an entrance other than the main entrance of the property. A garage, patio, or loading dock entrance is best.

Drywall Replacement and Painting

Once the mold is removed, you will likely need professional drywall installation and painting services to restore the areas that were affected by the mold. Be sure to choose a licensed general contractor who specializes in residential and commercial drywall and painting projects. They have the comprehensive resources to restore interior walls and foundations back to their original condition.

Choose Restoration By L&B LLC!

Home Repair Service 317-454-3612

Residential and Commercial Remodeling
317-454-3612

Call Restoration By L & B, LLC at 317-454-3612 for affordable remodeling, drywall, and painting services in Indianapolis, Indiana. We are licensed general contractors who offer a wide range of residential and commercial remodeling services, including interior and exterior painting, drywall repair, and more. Contact us today to request a professional on-site estimate. We guarantee to BEAT any competitor’s price!

Fundamental Tips for Cleaning Painted and Papered Walls

Whether painted or papered, walls can need a good wipe down every so often. This is especially true for properties with children and pets, or both! As property owners, we have mastered the art of carpet cleaning, window cleaning, and even oven cleaning; but what about walls? The right technique and proper solutions can clean walls with ease, but it is important to know these tips before getting your hands wet. This is because some wallpapers and paints react adversely to certain solutions and cleaning agents. Learning the proper methods and products for wall cleaning is the first step to getting the job done!

Drywall and Painting 317-454-3612

Drywall and Painting 317-454-3612

How to Clean Painted Walls

Cleaning painted walls is a large job, so preparation is key to making it as easy as possible. This means moving furniture away from walls and laying down cloth sheets, not tarp, to avoid slippery walking surfaces. It also means covering wall nails with a bit of dry sponge or rubber to protect your hands while cleaning, as well as, to remember where hanging frames belong. Once prep is complete, here’s what you need to get started:

Lamb’s Wool Duster
White Rags or Cloths
Natural Sponge (No colors)
Two Buckets (One for water, one for solution)
Rubber Gloves (Turn up sleeves to stop drips)
Step Ladder
Water
Liquid Dish Detergent

In the first bucket, combine 1 gallon of clean water with ¼ cup mild dish detergent liquid.

Fill the second bucket with clean clear water. This is for rinsing only. Change as needed throughout cleaning.

Using a duster, wipe down the entire surface area of each wall to remove loose dust, cobwebs, and other debris. Do not forget the baseboards and moldings.

Before applying moisture to the walls, keep in mind that dirty dripping water can dry and leave behind muddy stains. For this reason, always wash walls from BOTTOM to TOP, and then from SIDE to SIDE. Use your sponge to swipe up additional drips as you clean. Never take breaks in the middle of one wall, this can leave behind uneven cleaning marks. Finish an entire wall, then take a breather before beginning the next one.

Dip the sponge in the cleaning solution and gently apply it in a small area, then rinse the sponge in clean water and rinse the wall clean. Continue using this technique as you work your way through the entire wall.

Use the clean white cloths to pat the walls dry, removing any excess moisture left behind.

Wallpapered Walls

You can purchase store-bought wallpaper cleaners that are safe and effective for washable wallpaper. You can also just use some warm water and a little dishwashing liquid. If you have non-coated wallpaper, you do not want to apply moisture to it for cleaning. Instead, use a dry sponge, found at any local hardware store, to lift dirt and grime safely. And to remove fingerprints, use an art eraser to gently rub away the marks. The most important tip for cleaning wallpapered walls is to check the manufacturer guidelines first before you start.

Drywall Repair and Interior Painting Services Near You

Home Repair Service 317-454-3612

Residential and Commercial Remodeling
317-454-3612

Call Restoration By L & B, LLC at 317-454-3612 for professional drywall repair and interior painting services in Indianapolis, Indiana. We offer full-service interior and exterior painting solutions and drywall services for both residential and commercial properties. On top of already competitive prices, we guarantee to beat any competitor’s price! Call 317-454-3612 to learn how to get your estimate started, today.

Two Things to Consider Before Installing Tile Over Drywall

Indianapolis Kitchen Remodeling 317-454-3612

Indianapolis Kitchen Remodeling 317-454-3612

Whether a homeowner wishing to do some property upgrades, or a contractor remodeling a home, installing tiled walls is an appealing and unique way to add value and individuality to a room. Before you begin to move forward with your plans to tile over drywall, it is important to ask yourself two very important questions: 1) Which room is the wall located?, and 2) Will the wall be exposed to moisture or water? Continue reading to learn the two things you should always consider before installing tile over drywall.

Location

As mentioned, you want to start by asking yourself where the tiled wall will be located. This is because the location of the tiled wall will influence the type of installation you will need, as well as, the type of materials. Usually, people tile walls in rooms or areas of properties that are moisture-rich, such as bathrooms, showers, mud rooms, above kitchen sinks (backsplashes), and the spaces behind bathroom and kitchen sinks. This prevents the production of mold growth, and preserves the property’s structural integrity. Once you determine, or consider, which room and wall will be tiled, you can better answer your next question regarding water exposure.

Moisture

It is important to ask yourself whether or not the tiled wall will be exposed to water or moisture-rich conditions. For instance, showers and kitchen backsplashes are going to get wet and be exposed to water and moisture daily, whereas a tiled wall in the laundry room or vanity room may not. For areas that will not be affected or touched by water, you can simply move forward with your project and tile over the drywall using the proper tools and instructions. But if you are going to install tile over drywall in an area that will be subjected to water and moisture, you will need to add backer board first. Also called “cement board”, backer board goes between the drywall and the tile, and works as a barrier against moisture and water penetration. It is a waterproof material that comes in sheets, similar to drywall, and can be purchased at most home improvement stores.

Restoration By L & B, LLC

Home Remodeling and Painting

Home Remodeling Contractors 317-454-3612

Call Restoration By L & B, LLC at 317-454-3612 when you need licensed and insured home remodeling services in Indianapolis, Indiana. Owner, Lee Elliot, is happy to offer free advice for drywall installation, home remodeling, renovation, and more. Whether commercial or residential, we provide a wide range of remodeling services at the most competitive prices in town. In fact, we guarantee to BEAT any competitor’s price! Call 317-454-3612 to speak with a licensed general contractor in Indianapolis, IN today.

The Proper Handyman Repairs to Get Your Home Ready for Sale

Home Remodeling and Repair 317-454-3612

Home Remodeling and Repair 317-454-3612

When you finally make the decision to relocate, it is time to consider a few home repairs and upgrades to make your property more appealing for buyers. Because sometimes, a quick carpet clean and fresh coat of paint are not enough; but they are certainly a start! There are endless options to choose from when it comes time to get your home ready for sale, but knowing the right handyman repairs and projects to tackle can help you sell faster. It’s all about focusing on what’s important for a re-sale, rather than what makes the home aesthetically-pleasing.

Continue reading to learn which projects and repairs you should tackle first in order to get your home ready to be placed on the market!

Minor Repairs

As far as minor repairs go, these small enhancements can mean the difference between a few months on the market, and a few years. Simpler projects like nail pops, drywall repair, drywall replacement, and painting will get the ball rolling. These are the “go-to” repairs to do from room to room. If a room doesn’t require wall restoration, then a fresh paint job is all you need. A light, neutral color appeals to a broader range of buyers, allowing them to focus on your home’s best features. It also makes rooms look more spacious. Choose soft shades of greens, tans, and greys. Avoid flat white since this can look stark and shows dirt easier.

Carpets and floors should be cleaned or replaced. This gets rid of smoke, pet odors, cooking odors, dander, stains, and years of wear and tear. Although polishing floors and steam cleaning carpets is effective, it is not the best option. Replacing laminate flooring and carpeting is the best since most home-buyers are looking for turn-key properties with never-been-used furnishings. This also increases the home’s value, allowing you to ask more.

Major Repairs

Sometimes it is necessary to invest in some major home repairs to get the most from your home sale and expedite the process of selling. The important major repairs to focus on include your house’s paint color and condition, roof, foundation, insulation, windows, doors, plumbing, siding, and essential appliances (Heating and cooling system, sump pump, water heater, water softener, etc.). These major repairs and projects may be a bit costly on the front-end, but in the long-run, they will eventually pay for themselves once you sell your home at your asking price! Be sure to hire a licensed general contractor for all of these services. A professional team can safely and efficiently manage these minor and major repairs at a price you can afford.

Restoration By L & B, LLC

General Contractors Indianapolis IN

Tile Floor Repair and Installation 317-454-3612

Call Restoration By L & B, LLC at 317-454-3612 for affordable handyman repairs in Indianapolis, Indiana and its surrounding areas. Owner and general contractor, Lee Elliot, is happy to answer your questions regarding home restoration and repair. We provide a wide range of home repairs. Restoration By L & B, LLC has the experience, skills, and resources to get your home ready to be placed on the market, and sold fast! Call 317-454-3612 to schedule an assessment for handyman services in Indianapolis, today.

Tips for Ceiling Crack Repair

Drywall Repair and Painting 317-454-3612

Drywall Repair and Painting 317-454-3612

Everyone would probably agree that a home is an important and valuable asset. For this reason, it is important to protect properties from wear and tear. One common household repair that arises overtime are ceiling cracks. Ceiling cracks are important to repair if you wish to add a fresh coat of paint or improve the surface appeal of ceilings.

No matter what project you have on deck, a few ceiling cracks are nothing to fret about. A small portion can be easily repaired on your own, however, larger areas of ceiling cracks will probably require professional repair service. A good way to gauge this is by count. If there are more cracks than you can count, then you are most likely better off hiring a professional contractor.

Repairing Ceiling Cracks

Ceilings can be made of plaster or drywall. They each require a separate approach for repairing cracks, so it is crucial to know which material your ceilings are made of before getting started. Here is a step by step instruction guide for repairing ceiling cracks in both plaster (P) and drywall (D) ceilings:

Step 1

Plaster: Scrape loose paint and plaster fragments out of cracks with a screwdriver or 5in1 tool. Then widen cracks to ¼ an inch to hold a sufficient amount of patching compound.

Drywall: Use a 1 inch putty knife to scrape any loose paint or material around the cracks. Do not widen cracks.

Step 2

P: Use 100-grit sandpaper to smooth out the edges of the cracks.

D: Do the same for drywall ceilings.

Step 3

P: Remove all sanding dust and debris with cloth or vacuum.

D: Cut up pieces of fabric tape to a length that is a ½ an inch longer than the cracks. For winding cracks, use several small pieces to create one uniform piece.

Step 4

P: Using a plaster-repair or spackling compound, spread a layer of patching compound into the ceilings cracks with a 1” putty knife. Allow to dry for a minimum of 5 hours.

D: Using drywall mud or patching compound, spread a thin layer into cracks with a 3” putty knife. Spread out the material to a once inch circumference around the crack.

Step 5

P: Using 200-grit sandpaper, sand the dried material and cracks smooth.

D: Gently press the pieces of fabric tape onto to the wet compound with fingers and then smooth them out with 3” putty knife. Allow to dry for a minimum of 5 hours.

Step 6

P: Apply a second, thinner, and broader layer of compound over the cracks and adjoining paint. This reduces compound shrinkage problems and gives a smoother more uniform look. Allow to dry for a minimum of 5 hours.

D: Using 200-grit sandpaper, lightly sand edges of dried cracks.

Step 7

P: Using 200-grit sandpaper, sand the dried material and cracks smooth. Remove all sanding dust and debris with cloth or vacuum.

D: Apply a second, thinner, and broader layer of compound over the cracks and adjoining paint. Allow to dry for a minimum of 5 hours. Remove all sanding dust and debris with cloth or vacuum.

Restoration By L & B, LLC

Call Restoration By L & B, LLC at 317-454-3612 for professional ceiling repair in Indianapolis, Indiana. Owner, Lee Elliot, is a licensed general contractor that can provide a wide range of home and commercial remodeling services. We offer residential and commercial remodeling, restoration, renovation, and repair services at the most competitive prices in town. Call 317-454-3612 for drywall repair, painting services, and ceiling crack repair in Indianapolis, IN and its surrounding counties.

How to Patch a Plaster Wall

Remodeling a home can bring to light many unexpected surprises, like an old plaster-over-lath wall for instance. Many homeowners immediately feel the urge to rip down plaster and replace it with drywall. But sometimes, a plaster wall can be salvaged if done correctly. Continue reading to learn how to patch a plaster wall and more!

Drywall Repair and Painting 317-454-3612

Drywall Repair and Painting 317-454-3612

Patching Plaster

Plaster is applied to latticework, or laths, which are basically narrow boards or strips of wood that create a framework for a wall. Overtime, plaster can pop off its laths. Sometimes, if the plaster is firm and falls off in large pieces, they can simple be reattached and re-sealed. Other times, crumbled or soft plaster will need to be completely removed down to the latticework and to the outer edges of firm plaster, and then re-done from start to finish. Either way, patching up a plaster wall is possible and can be done all on your own with the right tools and knowledge.

How to Get Started

First, gather all your necessary supplies. You will most likely need a chisel, a trowel, lime putty (combination of hydrated dolomitic lime and water), clean dry cloths, fiberglass mesh tape, angle plane or drywall screen, a bonding agent, a mixing board, and a colorless sponge.

With all supplies ready to go, use the chisel to remove the old plaster from between the latticework. Be sure to wipe away all the loose plaster crumbs, dust, and debris.

Now, use your angle plane or drywall screen to smooth out the hole around the plaster. Next, apply the bonding agent over the latticework, as well as, all the plaster that is to be patched or re-coated.

Cover all of this, except for the small cracks, with your fiberglass mesh tape.

Next, prepare your lime putty by combining your hydrated dolomitic lime with water until you get a consistency similar to yogurt. Allow the lime to disintegrate in the water for at least 20 minutes, until a thin layer of water rests on the top. This ensures even re-hydration.

Apply a heap of the putty to your mixing board in a ring shape. Pour some bonding agent in the center and continue to mix in handfuls of gauging plaster until you achieve the proper consistency.

Use your trowel to mix all of this until you get a dough-like result. Apply this mixture to the exposed laths and around the edges of the holes, using firm pressing motions. Leave a slight decompression for the final coat later on.

Cut out another sheet of fiberglass mesh at a size that matches the hole and firmly press it into the wet plaster.

Mix another batch of the lime putty mixture, this time using less gauging plaster to get a softer product that’s easier to work with.

Apply a thin and final coat over the mesh and previously-lain plaster. Use your sponge to touch up any inconsistencies or imperfections on the wall.

Wait at least 30 minutes for everything to dry. Sanding should be necessary!

Professional Drywall and Plaster Patching Services

Patching up a plaster wall is not a novice job. It takes practice and a bit of handyman knowledge to do a good job. For this reason, most homeowners would better benefit from hiring a licensed general contractor for accurate and professional drywall or plaster wall repair services. And you’d be surprised just how inexpensive these services cost.

Restoration By L & B, LLC

Home Repair Service 317-454-3612

Home Repair Service
317-454-3612

Call Restoration By L & B, LLC at 317-454-3612 for professional wall repair services in Indianapolis, Indiana. Owner and licensed general contractor, Lee Elliot, is happy to answer your questions about plaster patching services, drywall repair, and more. We offer residential and commercial home remodeling and repair services at the most competitive prices in town. Call 317-454-3612 for a free estimate or information regarding drywall repair in Indianapolis, IN today.

How to Find Dry Wall Studs Without Using a Tool

Home Remodeling and Repair 317-454-3612

Home Remodeling and Repair 317-454-3612

Five holes in the wall and counting, with one hand holding a leveler and the other holding a pen; and the system continues to repeat, only to fail over and over again. Sound familiar? It is frustrating enough trying to hang a picture just right, let alone finding a stud to do it on first; but it’s vital to use studs in order to retain proper support and avoid wall damage. So many walls have suffered from failed stud finders and bad hunches.

Not to worry, as we have all had our failed stud-exploration experiences that we so badly wish to forget. Fortunately, that it is all in the past now. There are easier ways to find dry wall studs, rather than using an ineffective tool or stud finder to do it.

Locating Wall Studs

Before looking in the right place for wall studs, you must first know a few important facts about walls. For instance, the purpose of a stud is to hold up interior drywall and exterior sheathing. So you can always safely assume that studs are located at the top, bottom, or corners of walls. You can also assume that studs are 16 inches apart from center in newer homes, and mostly likely 24 inches from center in older homes. You can count on finding a stud behind an electrical box as they are generally held up by one. Another fact about walls you should know before going on a stud-hunt is that most molding and trim are nailed to studs. Also important to know, studs are typically located on either side of a window. This is good knowledge for curtain and valance hanging.

Instructions for Finding Drywall Studs:

If present, start at the trim or crown molding. Even though these areas are painted and caulked, you can sometimes see the nail cavity, or the point in which it was nailed into the wall. These features are only nailed into studs, so if you find where trim is nailed to the wall, simply measure 16 inches up and you should find a stud.

For properties without trim, you can start with the outlets and light switches. These are another indication of nearby wall studs. There is an electrical box on either side of an outlet, you simply have to figure out which one with a quick knock or tap. When you finally determine the right side, simply measure 3/4th of an inch outward, and then measure in 16 inch increments until you hit the stud you need.

Since we mentioned studs are at tops, bottoms, and corners of walls, you can also start at a corner wall and measure 16 inches inward to the center. Since all rooms are not always divisible by 16, use intuition and the knock-test to find a wall stud if measuring from a corner to center. Keep in mind that a stud could be just before, or just after, 16 inches from a corner wall, depending on the room’s dimensions.

Always remember to mark each stud as you find them, and patch up and fix any practice or mistake holes with caulk and paint. In the case that you have put too many holes in your wall, or you simply need to replace drywall for another reason, your best option is to call an Indianapolis general contractor for professional service.

Restoration By L & B, LLC

General Contractors Indianapolis Indiana 317-454-3612

General Contractors Indianapolis Indiana 317-454-3612

Call Restoration By L & B, LLC at 317-454-3612 for professional drywall repair services in Indianapolis, Indiana. Owner and operator, Lee Elliot, and his team of general contractors, are highly qualified and experienced in drywall services. We offer a wide range of drywall repair and replacement services for residential and commercial properties. We offer the most competitive prices for handyman work, so you can trust you are getting the best deal in town! Call 317-454-3612 to learn more about our drywall installation and repair services in Indianapolis, IN today.